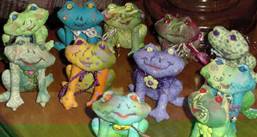
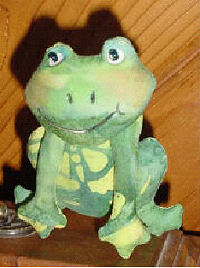
Here is a little froggie project for you to play with! "Hopper" is 3-1/2" tall. He is very simple to make, and he could be a pin or perhaps a key chain, but what he really likes best is to be someone's pocket pet! Those front legs dangle nicely over the front of a shirt pocket.
There are only three pieces, and they are all templates, so find some a small scrap of fabric, fold it with right sides together, and trace these three pieces - the head, front legs, and body onto the wrong side of the fabric. Shorten your machine stitch length to about 18 stitches per inch. Stitch all around the head and body, and leave the leg piece open where indicated. Cut them out, leaving a fat 1/8" SA. Clip the seam allowance to the stitching in the curves. In the middle of the head and in the upper part of the body, cut small slashes in the back side for turning and stuffing. Turn pieces right side out and smooth seams out with a chopstick or other tool.
Stuff the body firmly, especially the neck, legs and feet. Stitch the slash closed.
Stuff the front legs, making the feet firm and the rest of the legs fairly soft, and leaving the center section very soft (almost no stuffing in the center!).
Place the front legs on top of the body, lining up the front feet with the belly so that they all touch the floor evenly. Ladder stitch the legs to the body just at the center section.
Stuff the head firmly, especially the "eye bumps" and stitch the slash closed. Use either small buttons, or 4 mm beads, or two sequin with large seeds bead on top of them, or small "google-eyes" and stitch an "eye" into each bump on the head. Pull the thread to indent the eye slightly. Knot off thread on back of head. Run needle through from back of head and take two small stitches for nostrils, about 1/4" apart, near the center of the face. Either draw on a mouth with a permanent pen, or make a long outside stitch across the lower side of the face for a mouth, and couch the outside stitch down to hold it in place. If desired, use colored pencils to highlight the eye area, cheeks, and mouth. Add a crown, if this is your handsome prince, or "deck him out" in whatever trims you like! He will stand up on his own, or you can attach a pin-back, put him on a key chain, or just stuff him in a pocket! Have fun!
Pattern: Click HERE!
Click HERE to find more cloth doll patterns by Ruth Prest |


